Tuesday, December 15, 2009

Come on in ....

Merry Christmas & Happy Holidays! My husband, kids and I have been getting ready for the big day! We got our house decorated and tree up last week. And we even had enough snow to have a day off from school last week so we got a start on the holiday baking a little early (early for us anyway).

Come on in to our home and take a look at how we celebrate the Holiday season .... I will show your our home and share some of our favorite recipes ...

Oh Christmas Tree ...

Here is our Christmas tree ... my kid's most favorite part of Christmas (except for the presents of course)
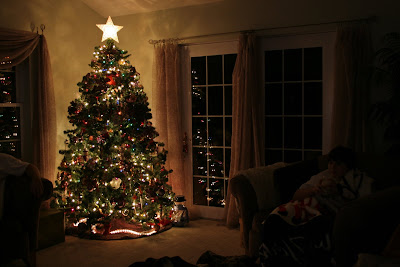
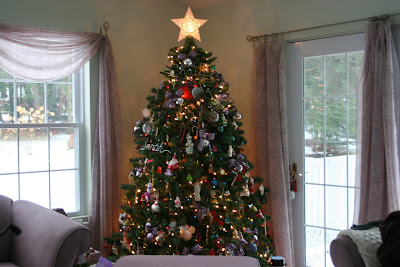
We have so many ornaments it's crazy! Here are a few our favorites ....


Some how over the years we started a tradition where the kids have there own 'side' of the tree. This is where they put their ornaments and this is the side of the tree where Santa delivers his presents. A few years ago we had these wire names made for our tree that way there is no confusion on which side is who's :). These are my favorite Christmas tree decorations ...


The right side 'belongs' to Matt...

The left side 'belongs' to Sarah ...

Let it Snow, Let it Snow ....


Have you ever seen a snowman kit ... All you need is snow ....


Cookie Time ...

Peanut Butter Balls:

Ingredients:
2 cups creamy peanut butter
1/2 cup butter
1 tsp vanilla
3 cups confectioner's sugar
3 cups crisp rice cereal
2 cups milke chocolate chips
2 tbsp shortening

Directions:
1. Melt peanut butter and butter in a large pot, over low heat. Add vanilla and mix. Add confectioner's sugar and mix until well combined. Remove from heat and add crispy rice cereal and mix together thoroughly.
2. Form 1 inch balls, spread on wax paper/parchment lined cookie sheets, chill until firm in the refrigerator.
3. Melt chocolate and shortening in a double boiler and keep melted while working with balls. Dip each peanut butter ball (I do one at a time) and then place on wax paper/parchment. A teaspoon to dip the balls works well (gently place the ball in the peanut butter and move the ball around with a teaspoon in the melted chocolate until covered well. Then remove the ball with the spoon).
4. Keep the peanut butter balls chilled until serving. Or you may freeze them and then thaw when ready to serve.


Hershey Kiss Blossom Cookies:


Ingredients:
3/4 cup peanut butter
1/2 cup shortening
1/3 cup granulated sugar
1/3 cup packed light brown sugar
1 egg
2 tablespoons milk (whole or 2%)
1 1/2 cups all-purpose flour
1 tsp baking soda
1/2 tsp salt
48 Hershey Kisses, unwrapped
Granulated sugar

Directions:

1. In a bowl cream the butter. Add the peanut butter and sugars and beat until light and fluffy (about 2-3 minutes). Add the egg and vanilla extract and beat to combine. Beat in the milk. In a separate bowl whisk together the flour, baking soda, and salt. Add to the peanut butter mixture and beat until incorporated. Cover and chill the batter for about an hour, or until firm enough to roll into balls.

2. Preheat oven to 375 degrees and place rack in the center of the oven.

3. Place the granulated sugar in a shallow bowl. Roll the batter into 1 inch balls and roll each ball in the sugar. Place on a prepared baking sheet.

4. Bake the cookies for about 8-10 minutes, or until the cookies or lightly brown. Immediately upon removing the cookies from the cookie sheet, place chocolate Kiss in the center of each cookie, pressing down until the cookie just starts to crack. Cool completely.


Happy Holidays from Us!


Monday, November 30, 2009

Apron Giveaway

The Fabric Shopper & I are offering my first Apron Giveaway!! I will be giving away one of my Utility Vendor Craft Aprons. This apron is great for those of you that are vendors at craft fairs or farmer's markets, as well as for those that like to craft, sew, scrapbook, stamp, etc. The apron has a total of 8 pockets. The front layer of pockets has 4 angled pockets and 1 small straight pocket. The angled pockets are great for items such as pens, pencils and scissors, and rotary cutters. The angled pockets are designed so that these items will not poke you while you are working, sitting or bending. The apron has a second (or back) layer of pockets which has 1 straight large pocket and 2 straight medium pockets. These pockets are great for carrying such things as money, receipts, and business cards.

Head over The Fabric Shopper and see how you can win this apron. Be sure to read through her blog and bookmark it. She has wonderful information about fabric, fabric sales & discounts, patterns, and more.


Good Luck!!

Sunday, November 15, 2009

Where Women Create

Over the past year I've met and read about so many talented women that create handmade goods either for themselves, friends, family or sell their handmade creations. It's just amazing what talent is out there. And the internet has been a great avenue for all of these women to 'meet' one another and learn from one another. My inspirations mainly come from seeing what these women are capable of the creating. So I've become a total internet junkie.. reading blogs, tweeting, facebooking, etc. But now and again I really like to sit down and hold a magazine in my hands and read articles and gaze at pictures and flip pages back and forth and not have to worry about bookmarking a link on my computer so I can find my way back. There's something to be said about holding a magazine or book in your hands. It really is satisfying. Last year a creative friend of mine introduced me this wonderful magazine called Where Women Create... wow !! ... I look forward to each and every issue. Each issue is filled with total inspiration . The magazine will introduce to you so many talented women and what they create, what inspires them, tips and tricks and best of all you get take a look inside their amazing studios. You really need to buy this magazine!!

You can find Where Women Create on twitter, facebook, and their blog. They are very active on the internet so there's always something to read that will inspire you!

Tuesday, November 10, 2009

Halloween Night

I'm not sure exactly why, but we all love Halloween in our family. The decorating, the food preparation, the costume ideas & creations ... it's all fun!

My daughter is still at the age where she loves to trick-or-treat. My son wasn't so sure if he was too old/too cool to trick-or-treat so he decided to have a party at our house and the boys could all decide if they wanted to trick-or-treat or not... of course... why wouldn't they wont to go door to door to fill up their enormous bags with candy!?! At one point during the night we had 25 kids gathered in our house. It really was a fun night for everyone!

As I said before I love to decorate for Halloween and make spooky foods. Here are some photos and recipes from our Halloween Night...

Our Haunted House...


Spooky Party Foods...

Swamp Punch:
Ingredients:

* 2 quarts lime sherbet
* 1 (12 ounce) can frozen limeade concentrate, thawed
* 2 liters carbonated lemon-lime beverage, chilled
* 1 1/4 cups cold water

Directions:

1. Spoon sherbet by tablespoonfuls into a punch bowl.
2. Mix 1.25 cups cold water with the lemonade concentrate; add to sherbet.
3. Slowly pour soda down side of the bowl; stir gently to mix.

Watermelon Brain:

Ingredients:

1 Watermelon cut in half lengthwise or purchase 1/2 watermelon

Directions:
  1. Slice off bottom of watermelon so it won't roll around.
  2. Peel green skin off of the watermelon.
  3. Score brainy folds in white flesh.
  4. With a sharp paring knife, carve channels out of melon to resemble cortical folds.
Finger Foods:
Ingredients:

* 1 can refrigerated breadstick dough
* 1 package sliced pepperoni

Directions:

1. Separate breadsticks and place on greased cookie sheet.
2. Cut pepperoni into fingernail shapes and press into dough.
3. Cut knuckle marks into "fingers" and sprinkle with rosemary to create a hairy-knuckle look. (I ran out of time to do this part)
4. Bake according to package directions.

Treats for my daughters class at school:

I made these treat bags from orange fabric and green polka ribbons. Real easy to make and the kids really enjoyed them (at least they acted like they did). Since the kids get so much candy at Halloween, I decided to fill the treat bags with somewhat healthy snacks, such as, gold fish, fruit roll ups, etc.


Here are the bags before I filled them...
Jack-O-Lantern Rice Krispy Treats...

Pumpkin Carving...

* *Happy Halloween!*

Monday, October 26, 2009

I Love Fall

I love this time of year. The days are cooling done, the kids are back in school, waves of color ... I just love it!

I thoroughly enjoy decorating for fall and Halloween, probably more than decorating at Christmas (I like that too). My kids still like to help with the decorating, playing in the leaves and carving pumpkins... Although my son tries to act like he doesn't enjoy it but he does... he would just rather make everything look scary. My daughter LOVES getting ready for Halloween.. she's had her carving tools and pumpkin face drawings ready for weeks. I'll show you the pumpkin carvings, her artwork, and small crafty things we've created later this week. In the meantime here are a few fall photos from last year...
Lightweight All Season Scarves:

The cool crisp air has inspired to make some fall scarves for those chilly mornings or evenings. These are lightweight made from 100% cotton and look great with a sweater or a vest. The can be worn any time of year. Here is one of the scarves made from brilliant blue peacock feather and daisy fabrics. This and a few other scarves are in my shop.


"I love fall! Fall is exciting.
It's apples and cider.
It's an airborne spider.
It's pumpkins in bins.
It's burrs on dog's chins.
It's wind blowing leaves.
It's chilly red knees.
It's nuts on the ground.
It's crisp dry sound.
It's green leavings turning.
And the smell of them burning.
It's clouds in the sky.
It's fall. That's why...
I love fall."
- Author Unkown

Thursday, October 8, 2009

What Have I Been Up To....

Wow, it's been almost a month since I have blogged! Again, life just keeps us busy and we need more time in each day. I'm getting bored of listening to myself say that .. Anyway, now that my kids are back in school and we are back to a regular routine I should be able to spend more time over here in blog world.

There's a few things I've worked on over the past few months but I haven't posted about them so I'm just going to give a run down here of what I have been working on. So this will be a rather lengthy post.

First, I've added some new items to my Etsy shop... The Carry-All Apron and Fabric Headbands.

Carry-All Apron

I tend to be the type of person that organizes by piling and gathering stuff. So I thought an apron that holds and carries all of my stuff while I'm working would be great. So I've been making Carry-All aprons and I totally love this style of apron for myself.

This apron has one large pocket where you can carry all of your necessities while working. It's much like a clothespin apron but with a modern twist in design.

Here's one made from Patty Young's Andalucia fabric collection ... I love her fabric!

You can find the Carry-All Aprons at my shop. Or you can make one yourself. you can see by the full view picture it's not hard to make.

And what to do with all the scraps of fabric...

Fabric Headbands

I have lots of hair and by the evening I can't stand it in my face .. so I'm a HUGE fan of headbands. I've tried various styles and my daughter and I find these to be the most comfortable, and they stay put on your head while being fashionable.


These headbands are available at my shop as well. So have a look.

Here are some other projects that I completed 'recently'.

Baby K's Activity Blanket and Jingle Balls

Back, way back, I posted that I was working on a project for Baby K. I finally finished and delivered this activity blanket and jingle balls to her.

It was so wonderful to hold Craylynn for the 1st time. Best of all my daughter was TOTALLY THRILLED to be able to hold her and spend some time with her cousin while being a mommy's helper.

The reverse side is made from soft minky fabricEach corner has ribbons securely sewn in so she can hang some linky links on them or just touch and feel.Each ball has a jingle bell inside so it's ring-a-ding's when you roll the ball or throw it. I also added various ribbons to one of the balls.

This was such a fun project!

IBOL .. Iraq Bundles of Love

Back in September I heard about this wonderful project, Iraq Bundles of Love (IBOL). This relief project was started by a US Soldier, Art La Flamme, to help familieis that were/are in desperate need for sewing supplies where soldier and his unit I came across this wonderful project a few days before the deadline. Art knows many of us have an over abundance of fabric, yarn and supplies. So he has reached to us for donations. All donations were to be sent to him by September 8th. He and his unit are currently delivering the bundles to where needed.

Bundles of Love ..

We got our bundle of love mailed just in the nick of time. I wish I had found this project earlier so I could have spent more time gathering items. But we did get a bundle sent and I hope it's helping someone that is in need. I can't imagine how life must be there for these families living in this chaos.

Our bundle was made of up large pieces fabric and yarns. The bundles were built to fit in a large flat rate box per Art's instructions ... (remember the deadline has been reached but thought you may want to see how the bundles were built).
Check out Art's blog to see updates on the delivery process and be sure to read through the blog to see how people contributed to this project. Saw Mama Sew did an amazing job at gathering bundles... so many volunteers, so many people participating. Check our her blog as well.

Thank you Art and his unit for doing this wonderful project!