Raspberry Sage Jam
This recipe is adapted from by Dessert by Candy's Black Raspberry Sage Jam
Ingredients
- 18 oz. red raspberries (or a combination of black and red raspberries), about 1 1/2 pint, washed and dried
- 1 cup granulated sugar
- zest and juice from half a lemon
- 1 tsp unsalted butter
- 2 large sage leaves, chiffonade
Method
( Dessert by Candy's instructions are great so I'm copying and pasting these from her website to go along with my photos)
1. Place a small white plate in the freezer. You’ll need it later to test the jam set.
2. Wash
your canning jars in hot soapy water. In a medium pot, fit a metal
trivet or steaming rack. Place the jars on the trivet inside the pot and
fill half way with water. Bring to a rolling boil and boil for 10
minutes to sterilize the jars.
3. In the mean time, put washed
berries in another medium size heavy bottom pot with a tall side. Mash
the berries with a potato masher. Add in sugar, lemon zest, lemon juice,
and butter. Bring to boil at high heat, stirring constantly.
4. Keep
cooking and stirring until the fruit mixture thickens. It will bubble
angrily and you just have to keep stirring. Due to the high level of
pectin in raspberries, the jam will likely reach setting point way
before it reaches 220F. I stopped cooking mine at 215F for a loose
consistency. To test whether your jam is done, remove pot from heat.
Using a metal spoon, drop a small spoonful of jam onto the cold plate
you put in the freezer earlier. Leave the plate in the freezer for one
minute. Nudge the puddle of jam with your finger. If the surface
wrinkles a bit and the jam doesn’t run when you hold the plate
vertically, it’s done. If not, cook the jam for another 2-3 minutes
before testing again.
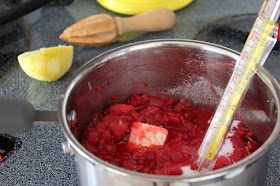
Yep, it did get a little messy with the anger bubbling..but easy enough to clean up when you are done.
5. Chiffonade two leaves of sage and then stir the sage into jam.
6. At this point you may fill your canning jars with jelly and follow the steps below. Or you may store in the jam in an air tight container and store in the refrigerator. This recipe makes a small enough to fill a jelly jar and can be stored for a few days. You will eat up quickly - it's delicious!
Now make yourself a piece of toast, spread lots of yummy jam on top (you may even want to add a bit of butter before the jam - yum!), and eat up!
I found these great free printable jam labels over here. I couldn't find one for Raspberry Sage Jam so I just hand wrote "sage" on the label.
Thanks for stopping by! Enjoy!!


Debbie, I'm happy the recipe turned out so well for you! The bright red hue is gorgeous. Here is another tip. If the raspberries are particularly seedy, you can set a fine mesh sieve over your pot just before you're ready to fill the jar. Ladle as much or as little of the cooked jam into the sieve to remove some of the seeds.
ReplyDeleteOh, Thank you for the tip. The berries did have a lot of seeds and I was thinking next time, I'd need to figure a way to remove them. Everyone loved the jam at our dinner last night. And my son loved the leftovers. Thanks again!
ReplyDelete