Monday, November 19, 2012

Turtle Cookies


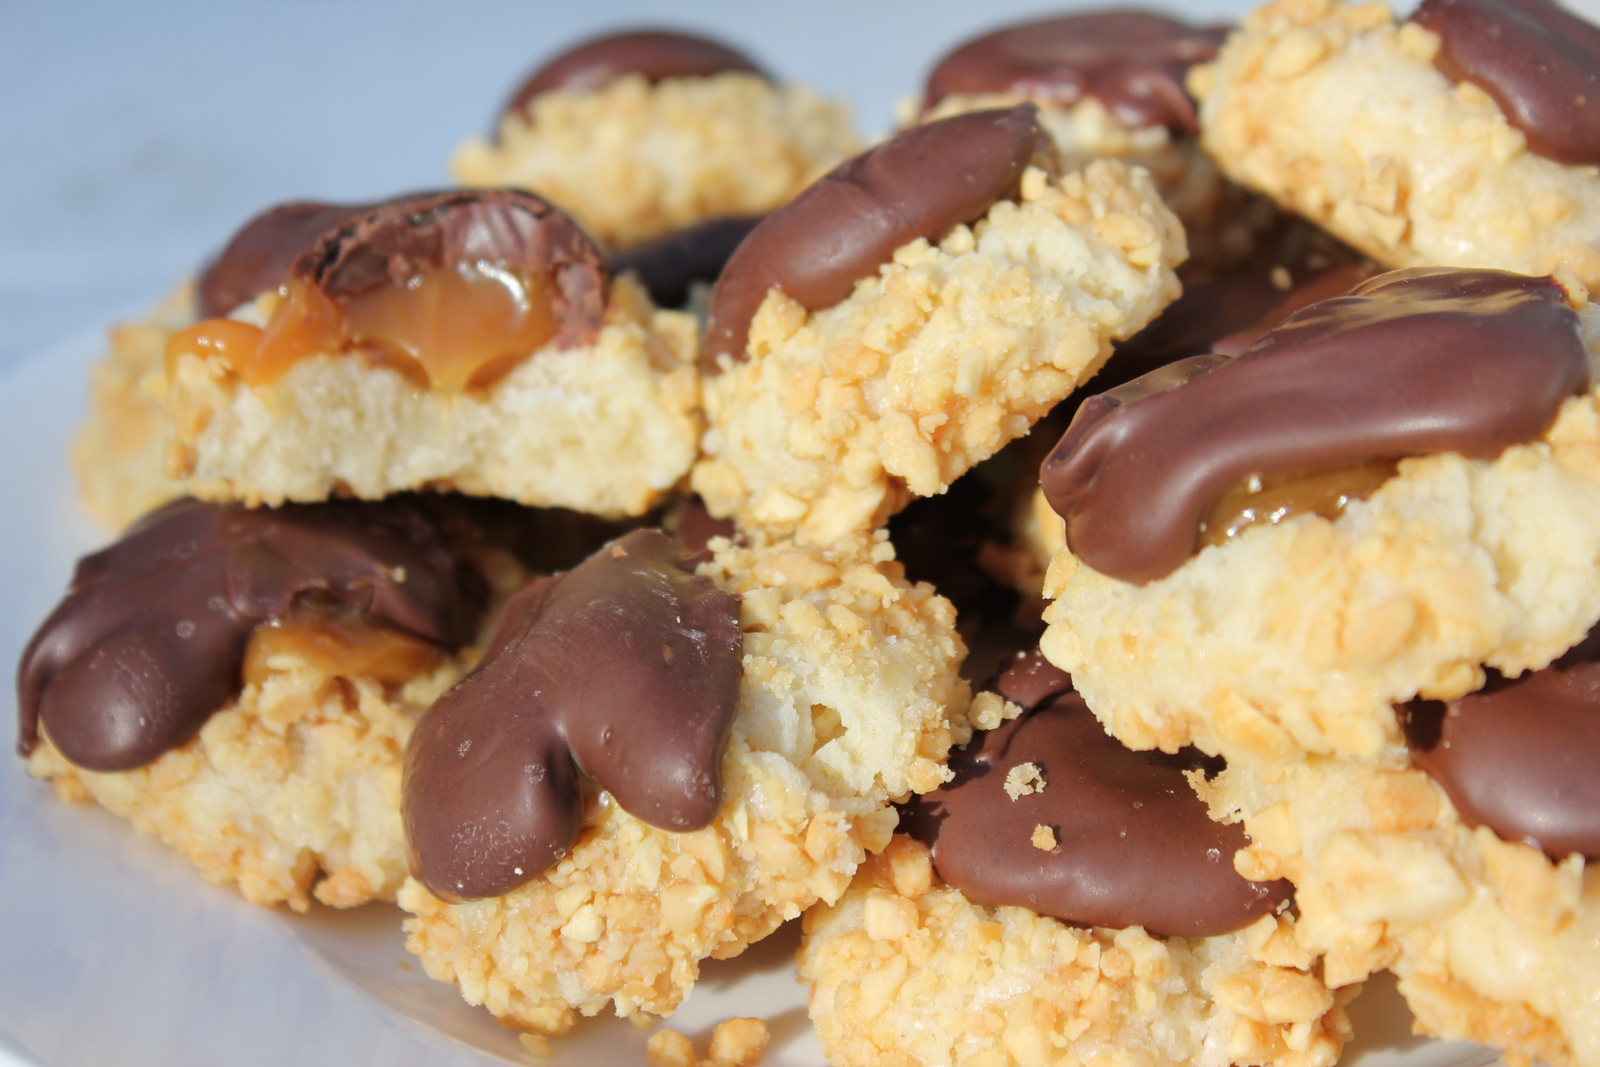
Getting ready for Thanksgiving and thought something a little chocolatey, gooey, and nutty would go perfect with our traditional Thanksgiving pies. This recipe is from a friend of mine and they are just delish! Great cookie for Christmas or any special occasion, or for any time you are just in the mood!
Ingredients:
  • 2 cups softened butter
  • 1 teaspoon vanilla
  • 4 cups flour
  • 3 egg whites
  • 2 cups crushed pecans or peanuts (I used salted peanuts)
  • 3/4 cup Marzetti's caramel dip
  • 2 cups confectioners sugar
  • 2 cups milk chocolate Maken' Mold Wafers (I substituted with 2 cups of milk chocolate chips and 1 Tablespoon of Crisco shortening).
Directions:
1.  Preheat oven to 325 degrees.
2.  Mix softened butter, vanilla, confectioners sugar and flour into a soft dough, roll dough into 1 inch balls.
3.  Dip each ball into the egg whites and then in the crushed pecans (peanuts).
4.  Place on an ungreased cookie sheet, 1 inch apart.  Make a thumbprint indentation into each ball.
5.  Bake for 15 minutes or until light golden brown on bottom of cookie.
6.  While still warm, drop a teaspoon of caramel dip into the center of each cookie.  As the cookie cools the caramel dip will fill the hole.
7.  Melt the Maken' Mold wafers in the microwave on low for 3 minutes, stir the chocolate halfway through the cooking time. (Or use and melt milk chocolate chips with 1 tablespoon of shortening). When the cookies are cool, drop melted chocolate over the top of the caramel dip, enough to cover.  Let chocolate harden and serve.
Enjoy!

Tuesday, November 6, 2012

Comfort Food - Pot Roast


A chilly day here has called out for some comfort food. I love cooking in my dutch oven and pot roast is one of my favorite dishes to make in it. This is my recipe. I love it and there's something in it that everyone in my family will eat:

Ingredients:
  • 3 1/2 lb chuck roast (or whatever cut of beef you like for pot roast)
  • 2 Tbsp olive
  • Salt, pepper, Italian seasoning to taste
  • 1 large yellow or sweet onions, thickly sliced, lengthwise
  • 4 cloves of garlic, peeled
  • 1/2 cup of white wine
  • 32 oz of beef broth
  • Several carrots, peeled and cut lengthwise
  • 2 large sweet potatoes, peeled and cut into quarters
  • 5 russet potatoes, peeled and cut into quarters
Directions

Use a thick-bottomed covered pot, such as a dutch oven, just large enough to hold roast and vegetables. Heat 2 Tbsp of olive oil on medium high heat. Pat the roast dry with paper towels. Sprinkle and rub salt, pepper, and Italian seasoning all over the meat. Brown roast in pot, all over, several minutes on each side. Brown it really well for the best flavor.

When roast is browned, remove from pan and set on a plate. Add the onions to the pan and cook for about 3 to 5.  Add the garlic and saute for another minute or two. Add 1/2 cup of white wine to deglase your pan. Cook for about 2 minutes and then add your beef broth. Set the roast on top of the onions, garlic and broth. Cover. Bring to simmer and then adjust the heat down to the lowest heat possible to maintain a low simmer when covered.

Cook for about 2 to 3 hours on a low heat. Now add your carrots, sweet potatoes and onions and cook for another 45 to 60 minutes or until you vegetables are cooked. 

Serve the meat and veggies with the broth. Or you may thicken the broth to make a gravy. We like it both ways. (Actually my husband and son prefer a thicker gravy).


Enjoy!!

Monday, October 1, 2012

Ginger Ice Cream

As you know from some other posts, I belong to a cooking club. We call ourselves Taste Tempters. We've been gathering every month for over 12 years. It's a great group of ladies and we always seem to come up with great cooking themes and recipes.

This month's theme was "Thai One On" where we all prepared a food with a Thai theme.

I made Thai Green Curry Chicken, Thai Tea Ice Cream, and this Ginger Ice Cream with Condensed Milk Cookies. I don't know if you would call ginger ice cream a true Thai dish but I have found on menus at some local Thai restuarants and it seemed to me that it to be a good palette cleanser after dinner. I served with condensed milk cookies which could be eaten on the side with the ice cream or made into a delicious ice cream sandwich.

This recipe is from Anne Burrell and found it on Foodnetwork.com. Anne suggests to make ice cream sandwiches with molasses cookies. This is a definite Thanksgiving and/or Christmas dessert I will be making. As you can see this ice cream been served any time of year for any occasion. 

Ingredients:
  • 3 cups heavy cream
  • 1 cup granulated sugar
  • 1 teaspoon vanilla extract
  • One 4-inch piece gingerroot, peeled and coarsely chopped
  • 6 eggs
  • Molasses Cookies, if serving as ice cream sandwiches, optional recipe follows

Directions:

  1. In a medium saucepan combine the cream, 1/2 cup of the granulated sugar, vanilla extract and ginger. Bring to a boil, turn off the heat and let sit for 1 hour.
  2. In a small bowl, combine the eggs and the remaining 1/2 cup sugar and beat to a homogeneous consistency.
  3. ring the cream-ginger mixture back to a boil and turn the heat off. Immediately strain and whisk a third of the cream mixture into the egg-sugar mixture and then immediately whisk the egg mixture back into the remaining cream mixture.
  4. Chill the mixture over an ice water bath.
  5. Churn the chilled mixture in an ice cream machine according to the manufacturer's directions. 
  6. Serve as is, or to make ice cream sandwiches (using Condsensed Milk Cookies or Anne's Molasses Cookies).
 

~Enjoy!


Condensed Milk Cookies


These roll out / cut out cookies have a soft texture and are mildly sweet with a buttery taste that I find familiar at Christmas time. They are great just plain, dipped in tea or coffee, or serve with ice cream. This recipe is from Local Milk and she made Thai Ice Cream Sandwiches using these cookies.This is what gave me the idea to make and serve them with a Ginger Ice Cream that I made last week for my cooking club's "Thai One On" dinner.

We all enjoyed the cookies with our ice cream and hot tea (they are delicious with a hot cup of tea!) 


This is a great dough to work with and the cookies freeze beautifully. They can be cut into any shape and would be great for any holiday or festivity. Decorate for any holiday with colored sugars (such as red & green sugar for Christmas, orange sugar for Halloween, pastel sugars for Easter, or whatever colors you'd like for your special holiday or festivity.)


Ingredients:

  • 3 1/2 cups all purpose flour, plus up to an additional 1/2 cup
  • 2 sticks (1 cup) butter, at room temperature
  • 3/4 cup sugar, plus extra for sprinkling (optional)
  • 1 (14 oz) can condensed milk
  • 2 tsp baking powder
  • 1/4 tsp salt
  • 2 eggs
  • 1 Tbsp vanilla extract

Directions:

Mix flour, baking powder, and salt in a medium bowl. Set aside.

Cream butter & sugar in the bowl of a stand mixer until fluffy. Mix in eggs, vanilla, and condensed milk.


When combined add dry ingredients about one cup at a time and mix until just combined. If mixture appears too wet add up to another 1/2 cup of flour until desired consistency.  Note: this dough will seem wet but it will chill and harden in the refrigerator before rolling out. (I did use all 4 cups of flour and the dough came out great for rolling).


Divide dough into two discs and wrap with plastic and refrigerate for at least half an hour and, if making ahead, up to three days. Dough can also be frozen at this point up to three months.


Heat oven to 350° F


Place dough on a floured work surface and roll out to 1/4-1/8 of an inch thick. Cut into desired shapes. Using a wooden skewer or other object (like the tip of a thermometer, as suggested by Local Milk) poke the cookies with holes. Sprinkle with sugar if desired.


Bake at 350° for 8-10 minutes. Cool for at least 10 minutes on racks. If using for ice cream sandwiches, place in a large ziplock bag and freeze. Otherwise they can be stored in an air tight container or frozen (and brought to room before serving).


I found these cookies to taste best after the sit for a few hours or the next day.


Enjoy!

Thai Green Curry Chicken

 
Last week our cooking club, the Taste Tempters, met for a "Thai One On" dinner theme. I prepared three dishes to bring to dinner, Thai Green Curry Chicken, Ginger Ice Cream and Condensed Milk Cookies. All of the food was great. I have to say we have some awesome cooks in this group. This Green Curry Chicken recipe is from About.com. It looks really complicated but if you make the green curry paste ahead of time (even the day before), it's real easy to prepare.

If you like Thai food this recipe is a must try!
Ingredients:
  • GREEN CURRY PASTE:
  • 4 small green Thai chilies, OR substitute 1 to 2 jalapeno peppers
  • 1/4 cup shallot OR purple onion, diced
  • 4 cloves garlic, minced
  • 1 thumb-size piece galangal OR ginger, grated
  • 1 stalk fresh minced lemongrass OR 3 Tbsp. frozen or bottled prepared lemongrass
  • 1/2 tsp. ground coriander
  • 1/2 tsp. ground cumin
  • 3/4 to 1 tsp. shrimp paste
  • 1 (loose) cup fresh coriander/cilantro leaves and stems, chopped
  • 1/2 tsp. ground white pepper (can be purchased at some supermarkets, OR at Asian food stores)
  • 3 Tbsp. fish sauce
  • 1 tsp. brown sugar
  • 2 Tbsp. lime juice
  • CURRY INGREDIENTS:
  • 1 to 1.5 lbs. (about 0.7 kg) boneless chicken thigh or breast, cut into chunks
  • 1 can coconut milk
  • 4 kaffir lime leaves (can be purchased frozen at most Asian food stores), OR substitute 1 tsp. grated lime zest
  • 1 red bell pepper, seeded and cut into chunks
  • 1 zucchini, sliced lengthwise several times, then cut into chunks
  • Generous handful fresh basil
  • 2 Tbsp. coconut oil or other vegetable oil
Preparation:
  1. Place all the "green curry paste" ingredients together in a food processor, and process to a paste. If necessary, add a few Tbsp. of the coconut milk to help blend ingredients. Set aside.
  2. Prepare the lime leaves by tearing the leaf away from either side of the stem. Discard the central stem. Then, using scissors, cut leaves into thin strips. Set aside.
  3. Warm a wok or large frying pan over medium-high heat. Add the oil and swirl around, then add the green curry paste.
  4. Stir-fry briefly to release the fragrance (30 seconds to 1 minute), then add 3/4 of the coconut milk, reserving 2-3 Tbsp. per serving portion for later.
  5. Add the chicken, stirring to incorporate. When the curry sauce comes to a boil, reduce heat to medium or medium-low, until you get a nice simmer.
  6. Cover and allow to simmer 3-5 more minutes, or until chicken is cooked through. Stir occasionally.
  7. Add the red bell pepper and zucchini, plus the strips of lime leaf (or lime zest), stirring well to incorporate. Simmer another 2-3 minutes, or until vegetables are softened but still firm and colorful.
  8. Do a taste-test for salt, adding 1-2 Tbsp. fish sauce if not salty enough. If you'd prefer a sweeter curry, add a little more sugar. If too salty, add a squeeze of lime or lemon juice. If too spicy, add more coconut milk. Note that this curry should be a balance of salty, spicy, sweet and sour, plus bitter (the bitter is found in the fresh basil garnish).
  9. Serve this curry in bowls with Thai jasmine rice on the side, allowing guests to add their own. Top each portion with fresh basil, then drizzle over 2-3 Tbsp. coconut milk.
 Enjoy!

Sunday, September 23, 2012

Fall is Here & Acorn Squash


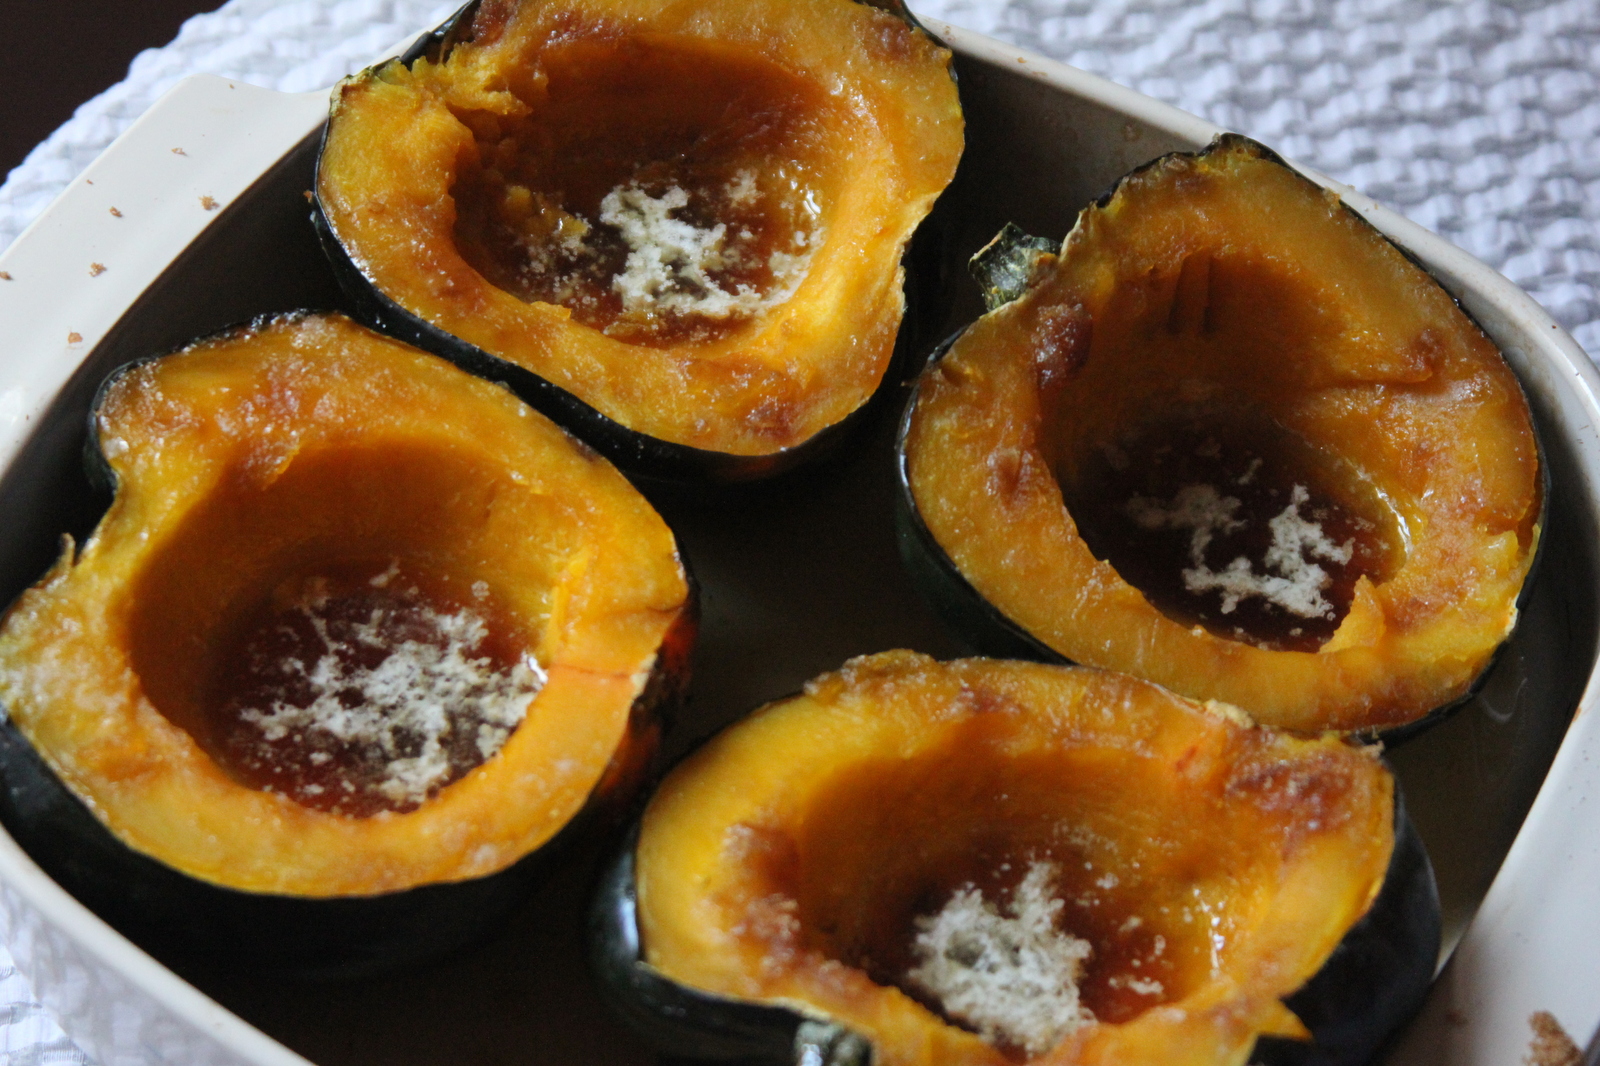
The weather has quickly cooled down around here. It was a brisk 40 degrees this morning when we woke up this morning. I stopped by a small local grocery store today and they were just brinigng in some Acorn squash. Just a perfect idea for a side dish to go with our chicken dinner tonight. Acorn squash are easy to prepare - just cut them in half, scoop out the seeds, add some yummy toppings like a little brown sugar, maple syrup, butter and bake for a little over an hour. 

 Ingredients:
  • 1 Acorn squash
  • 1 Tbsp Butter
  • 2 Tbsp Brown Sugar
  • 2 teaspoons Maple Syrup
  • Dash of Salt
Directions:
  1. Preheat oven to 350 degrees F..
  2. In a large casserole or baking dish, turn acor
  3. Turn squash upside down so that the flesh faces down. Fill with the baking dish with approximately 1 inch of water (to keep the squash from burning). Bake in a 350 degrees oven until it begins to soften, approximately 30 to 45  minutes.Do not under cook.
  4. Remove squash from the oven and turn right side up so that the flesh is facing upwards. (Keep the squashin the baking dish). Place butter, maple syrup, and brown sugar into each squash.
  5. Place squash in the 350 degrees F (175 degrees C) oven and bake another 20-30 minutes. 
Note: I made 2 acorn squash (4 halves). So I doubled the recipe. You can add more brown sugar and/or maple syrup to your liking. I went for a little extra maple syrup tonight.  (The white you see in the photo is the butter, it foamed up a little bit while baking - nothing wrong with that, it still tastes great).


I Love Fall!!

Wednesday, September 12, 2012

Warm Butter Buns


My all time favorite thing to cook is any kind of bread, roll or bun. I've been collecting pins over on Pinterest of all the breads that I would love to try. Of course it would take some time to make each recipe but I'll give it whirl and see how many I can make during the fall and winter months ahead. 

This a Butter Bun recipe that I found from Roxana's Home Baking. It's really easy and tastes great (especially right out of the oven).

The Butter Buns look a bit different that what hers do I. I think it has something to do with how I added the yeast (I made a bit of mistake while making them-I didn't let the yeast dissolve very well in the first step) but they still tasted great with our Roast Beef and Mashed Potatoes dinner.

Here is the recipe that I got from her blog. Be sure to check out her blog and her recipes. She has some real good ones that are worthy to try.

Roxana has a great tutorial for you follow while making these.

Ingredients:
  • 1/4cup water or milk
  • 1 pkg Rapid Rise Yeast
  • 4 cups all-purpose flour 
  • 1 egg or 2 egg yolks
  • 4 Tbsp melted butter
  • 1 cup luke warm milk
  • 1 to 2 tsp salt (I used 1 tsp salt since I used salted butter)
 Directions:
  1. In a bowl mix 1/4 cup water or milk with 1 package rapid rise yeast.
  2. Stir and let the yeast dissolve. It’s going to slightly foam.
  3. In your mixer bowl add 4 cups all purpose flour
  4. Pour the yeast mixture over the flour
  5. Add 1 egg or 2 egg yolks
  6. And 4 tbsp melted butter
  7. In a measuring cup mix 1 cup of lukewarm milk or water with 1-2 tsp salt. If you used salted butter I you may not want to use more than 1 tsp of salt.
  8. Start mixing slowly adding the milk (or water)
  9. The dough might need a little bit more milk. Slowly add 1 tbsp at a time until the dough is soft and cleans itself from the sides of the bowl.
  10. Put the dough into a greased bowl, cover with plastic foil and leave at room temperature until it doubles in volume. (should take about 30-40 minutes)
  11. Grease a 11×7 deep dish and put aside. Divide the dough into 16 almost equal balls. Shape them into small baguettes and place them into the baking dish. Cover again with plastic foil and leave at room temperature.
  12. Turn the oven on and let it reach 375F. The oven should be on for about 10 minutes (plus other 5 minutes until it reaches the desired temperature) before you place the buns in.
  13. When your oven is nice and hot and your buns are almost doubled in size brush them with some more melted butter and place them into the oven
  14. Bake for 23-25 minutes until golden. Brush with some more butter as soon as you take them out of the oven. (I eliminated the extra butter here .. however I served these warm with extra butter for those that wanted it),
Enjoy warm from the oven with some butter! yum!