Monday, November 2, 2015

Pan de Muertos (Mexican Bread of the Dead)


Dead bread (pan de muerto)
a traditional Mexican sweet bread eaten during Dia de los Muertos.

This bread is made for the November 2 celebration known as the Dia de los Muertos (Day of the Dead) in Mexico. Celebrants make a sweet bun-shaped bread that is decorated with finger-shaped pieces to represent the bones of the deceased.

My daughter will be celebrating Dia de los Muertos in her Spanish club today. She volunteered to make and bring this bread in for the celebration.

I absolutely love making yeast breads so I couldn't wait to give this bread a try with my daughter. 

The bread is light and airy. a bit sweet with a hint of anise and orange. It is absolutely delicious with a bit of butter. I think it would be a great bread for any holiday or celebration.

 pan de muerto

 We adapted the pan de muerto recipe from  


Bread ingredients:
  • 4 1/2 to 5 1/2 cups all-purpose flour, plus additional for kneading
  • 1/2 cup granulated sugar
  • 1 teaspoon salt
  • 2 packets (1/4 oz. each) rapid-rising dry yeast
  • 2/3 cup evaporated milk
  • 1/3 cup water
  • 1/2 cup butter
  • 4 large eggs
  • 1-2 teaspoons of anise seeds
Bread glaze ingredients:
  • 1/2 cup granulated sugar
  • 1/3 cup orange juice
  • Granulated or coarse ground sugar
  Directions:
  1.  Combine 1-1/2 cups flour, 1/2 cup sugar, anise seeds, salt and yeast in large mixing bowl. Heat evaporated milk, water and butter in the microwave until mixture reaches 115 to 120 degrees and butter is melted. (Temperature is critical as too much heat could kill the yeast and not enough heat will cause it not to activate).
  2. Make a well in the center of the flour mixture; pour in milk mixture. Beat with electric mixer on medium speed until blended. (No need to use a dough hook). Add eggs and 1-1/2 cups flour; mix well. Gradually add remaining 1-1/2 to 2-1/2 cups flour , a 1/2 cup at a time, mixing well after each addition until dough is smooth but not sticky.
  3. Place dough on lightly floured surface; knead 10 to 15 minutes or until dough is moderately stiff, smooth and elastic. Additional flour may be needed to help prevent sticking. Place dough in large greased bowl; turn over. Cover with greased plastic wrap.
  4. Let rise at room temperature for 60 to 75 minutes.
  5. Punch dough down. Cut dough into 3 equal portions to make 2 loaves and 1 for decorations. On lightly floured surface, kneading as necessary, shape 2 of the portions into round loaves. Place on greased baking sheets. Keep all dough portions covered with greased plastic wrap to prevent drying of dough.
  6. Shape remaining dough portion into 2 small balls and braids or bones. To decorate, place 1 small ball on top of round loaf, surrounding each ball with the remaining braid or bone decorations. 
  7. To adhere shapes to dough with dabs of water.
  8. Loosely cover bread loaves with greased plastic wrap. Allow to rise at room temperature for another 30 minutes.
  9. Preheat oven to 350 degrees. Meanwhile, prepare  the glaze. Combine 1/2 cup sugar and orange juice in small saucepan. Bring mixture to a boil over medium heat. Continue cooking, stirring frequently, until syrup is formed, about 5 minutes. (Mixture may bubble up; remove from heat if it does, stir and then return to heat.) Remove from heat.
  10. Bake loaves for 20 minutes. Remove from oven and brush loaves with syrup glaze. Sprinkle with sugar; return to oven. Continue baking for an additional 5 to 10 minutes or until golden brown and sounds hollow when tapped.

Bread after applying the glaze. You can leave it like this or sprinkle with sugar
 

Enjoy!!

Sunday, March 29, 2015

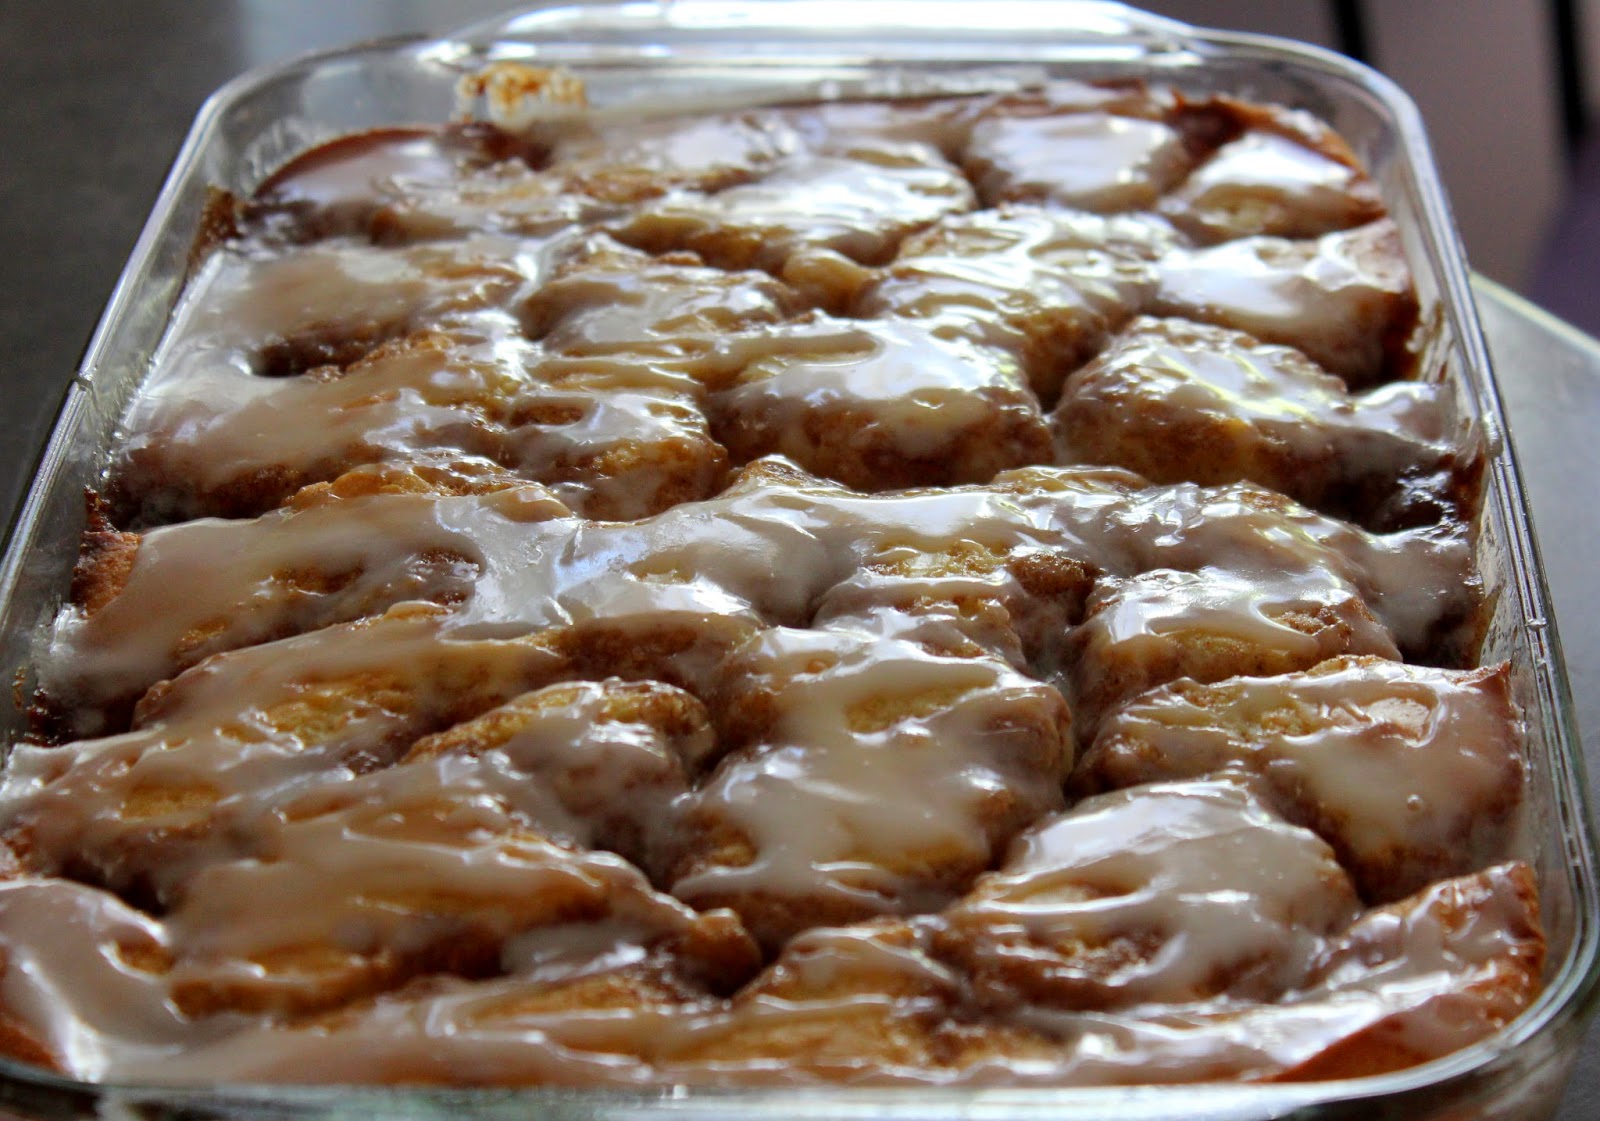
Cinnamon Roll Cake


My family loves cinnamon rolls but I don't always have the time to make the dough and let rise. This Cinnamon Roll Cake is the perfect substitute. This is definitely a treat and is great to make for special occasions such as Easter, Christmas, any Holiday, or on an occasional Sunday morning, like today.There's not much else I can say about this other than it is really yummy and pretty easy to make. It's great right out of the oven or at room temperature (I personally prefer room temp). Coffee or milk is a must with this.


Cinnamon Roll Cake

Cinnamon Roll Cake:

CAKE:
3 cups Flour
1/4 teaspoon Salt
1 cup Sugar
4 teaspoons Baking Powder
1 1/2 cups Milk
2 Eggs
2 teaspoons Vanilla
4 T Butter, melted

TOPPING:
1 cup ( 2 sticks) Butter, softened to room temperature
1 cup Brown Sugar
2 Tablespoons Flour
1 Tablespoon Cinnamon

GLAZE:
2 cups Powdered Sugar
5 Tablespoons Milk
1 teaspoon Vanilla

DIRECTIONS: Preheat oven to 350 degrees. Spray a 9×13 glass baking pan with cooking spray. Set aside.

In an electric or stand mixer add the flour, salt, sugar, baking powder, milk, eggs, and vanilla. Once combined well , slowly stir in the melted butter. Pour into the prepared 9×13 baking pan.

FOR TOPPING, In a large bowl mix the 2 sticks of butter, brown sugar, flour and cinnamon together until well combined and creamy. Drop evenly over the batter by the tablespoonfuls and use a knife to marble/swirl through the cake. (I found it hard to swirl so just left it be and it came out perfect).

Bake at 350 for 28-32 minutes or when a toothpick inserted near the center comes out nearly clean.

FOR GLAZE: In a medium bowl, mix the powdered sugar, milk and vanilla together with a whisk. Drizzle evenly over the warm cake. Serve warm or at room temperature.


Enjoy!!

Saturday, February 14, 2015

Valentine's Day Sour Cream Cutout Cookies Personalized with White Chocolate Names


Happy Valentine's Day! 
Nothing says I love you more than a soft cutout sugar cookie with buttercream frosting and personalized with your name in chocolate

I made these for my daughter and her friends Valentine's Day. 
They will be celebrating one of the girls 16th birthday. 
The birthday girl is a huge fan of Harry Potter so I personalized 5 of the cookies with their names and then added a few Harry Potter decorations as well as a Sweet 16 decoration.

I decorated the cookies with buttercream frosting and then made their names and Harry Potter decorations with white chocolate candy coating. It's real simple, just print out the names and.or decorations and then trace ontop of wax paper. The peel off easily and then can be placed on top of a freshly frosted cookies.

Below are the recipes for the cookies and buttercream frosting and 
a tutorial for making chocolate names and designs.


Sour Cream Cutout Cookie Recipe:

Sour Cream Cutouts:

Ingredients:
2 cups sugar
1 cup sour cream
3 eggs
1/2 cup butter or margarine, softened
1/2 cup vegetable shortening
5 1/2 cups all-purpose flour
2 tsp. baking powder
2 tsp. baking soda
1 tsp. vanilla
1 tsp. almond extract
1/4 tsp. salt


Makes 10 dozen cookies

Directions:
In large mixing bowl, combine sugar, sour cream, eggs, butter and shortening. Beat at medium speed of electric mixer until light and fluffy. Add flour, baking powder, baking soda, vanilla, almond extract and salt. Beat at low speed until soft dough forms. Cover with plastic wrap. Chill 1 to 2 hours, or until firm. Note: this dough is very soft, don't worry. Let it chill for a few hours and it will be perfect to roll out and cut. 


Heat oven to 350 degrees. On well-floured surface, roll dough to 1/4 inch thickness (don't cut any thinner). Using 3 inch cookie cutters, cut desired shapes into dough. Place shapes 2 inches apart on ungreased cookie sheets. Bake for 6 to 8 minutes, or until edges are light golden brown. Prepare frosting as directed. Decorate cookies as desired. Let dry completely before storing. Freeze well unfrosted.


Buttercream Frosting:

Ingredients:
1/2 cup unsalted butter, softened
1/4 cup shortening
5 cups powdered sugar
2 teaspoon vanilla extract
1/4 cup milk
pink food coloring


Directions:

Mix softened butter on medium speed with an electric or stand mixer. Beat for 30 seconds until smooth and creamy.

Add powdered sugar, and vanilla extract until crumbly. Gradually add milk until frosting reaches desired consistency. Add a couple drops of pink food coloring.

Frost each sugar cookie using a knife and sprinkle with pink sprinkles.


Chocolate Names & Designs Tutorial

 Type your names using MS Word or your favorite word processor and print on white paper

 Place a sheet of waxed paper on top of the printed page

Melt the candy coating, such Make 'N Mold chocolate 
and place in a squirt bottle or decorating bag
 

Trace the name with the melted candy coating / chocolate
 

Let the candy coating / chocolate harden (it just takes a few minutes)
 
 Peel chocolate name from the wax paper and place on freshly frosted cookies


~Happy Valentine's Day~