

Last month, for Valentine's Day, I made Fabric Hearts using this tutorial over at How About Orange. And while making them I thought to myself that it be fun to try making Fabric Shamrocks for St. Patrick's Day and Fabric Easter Eggs for Easter.
Here are the shamrocks I made for St. Patrick's Day. There are so many things you can do with them .. make a garland (or bunting), gift topper, use them to make a wreath, or just hang them around the house.
Here is a small garland I made for the door in my sun room (too bad it's never sunny)...


St. Patrick's Day Wreath ...


Look ..It IS spring! ... little tiny birds nest .. I've been watching mama make it...


This is our "party, holiday, celebration room" ... aka Dining Room .. I place a few on my hutch


Using the tutorial from How About Orange's Fabric Heart Garland, I came with some steps (or if you will, a tutorial) on how to make Fabric Shamrocks.
Step 1: Cut and Stiffen your fabric:
Cut a 14x14 inch piece of fabric (you can cut larger or smaller pieces - what ever works best for you). And then you will stiffen the fabric piece(s) with a fabric stiffener, such has Stiffen Quick, to stiffen the fabric piece(s). I used the microwave method (per directions on back of the bottle) since it's quick and easy:
- Place something on your table or counter to protect from the fabric stiffener spray. I just cut some plastic grocery bags and laid them down on my work space.
- Spray your fabric (according to the directions on your fabric stiffener).
- Microwave or let air dry. For Stiffen Quick and my microwave it took 30-45 seconds to dry and stiffen the fabric. Note: I placed some paper towels in my microwave to protect it from getting all sticky from the fabric stiffener.


Once the fabric has completely dried, press your fabric pieces so that they are flat and are rid of any wrinkles. I used a dry iron. But the steam iron worked ok too (I did not effect the fabric, the iron or ironing board cover) - I actually preferred the steam ironing results.
Step 2: Make a set of four paper shamrock templates (or use my templates):
You will need to make four paper shamrocks that get progressively larger than the previous one.
I found a shamrock printable pattern over at Family Fun that I used to make my shamrock templates. I printed the pattern, cut out the smallest shamrock, scanned it, and then sized it according to my liking. Starting with the first shamrock, I made 3 more shamrocks by increasing the size of each one so that each one was a bit larger than it's orginal (I made each one about 10% larger than the previous one). You can do this yourself with whatever shamrock photo, clipart you have. Or If you'd like to use my Shamrock Template, feel free to do so.
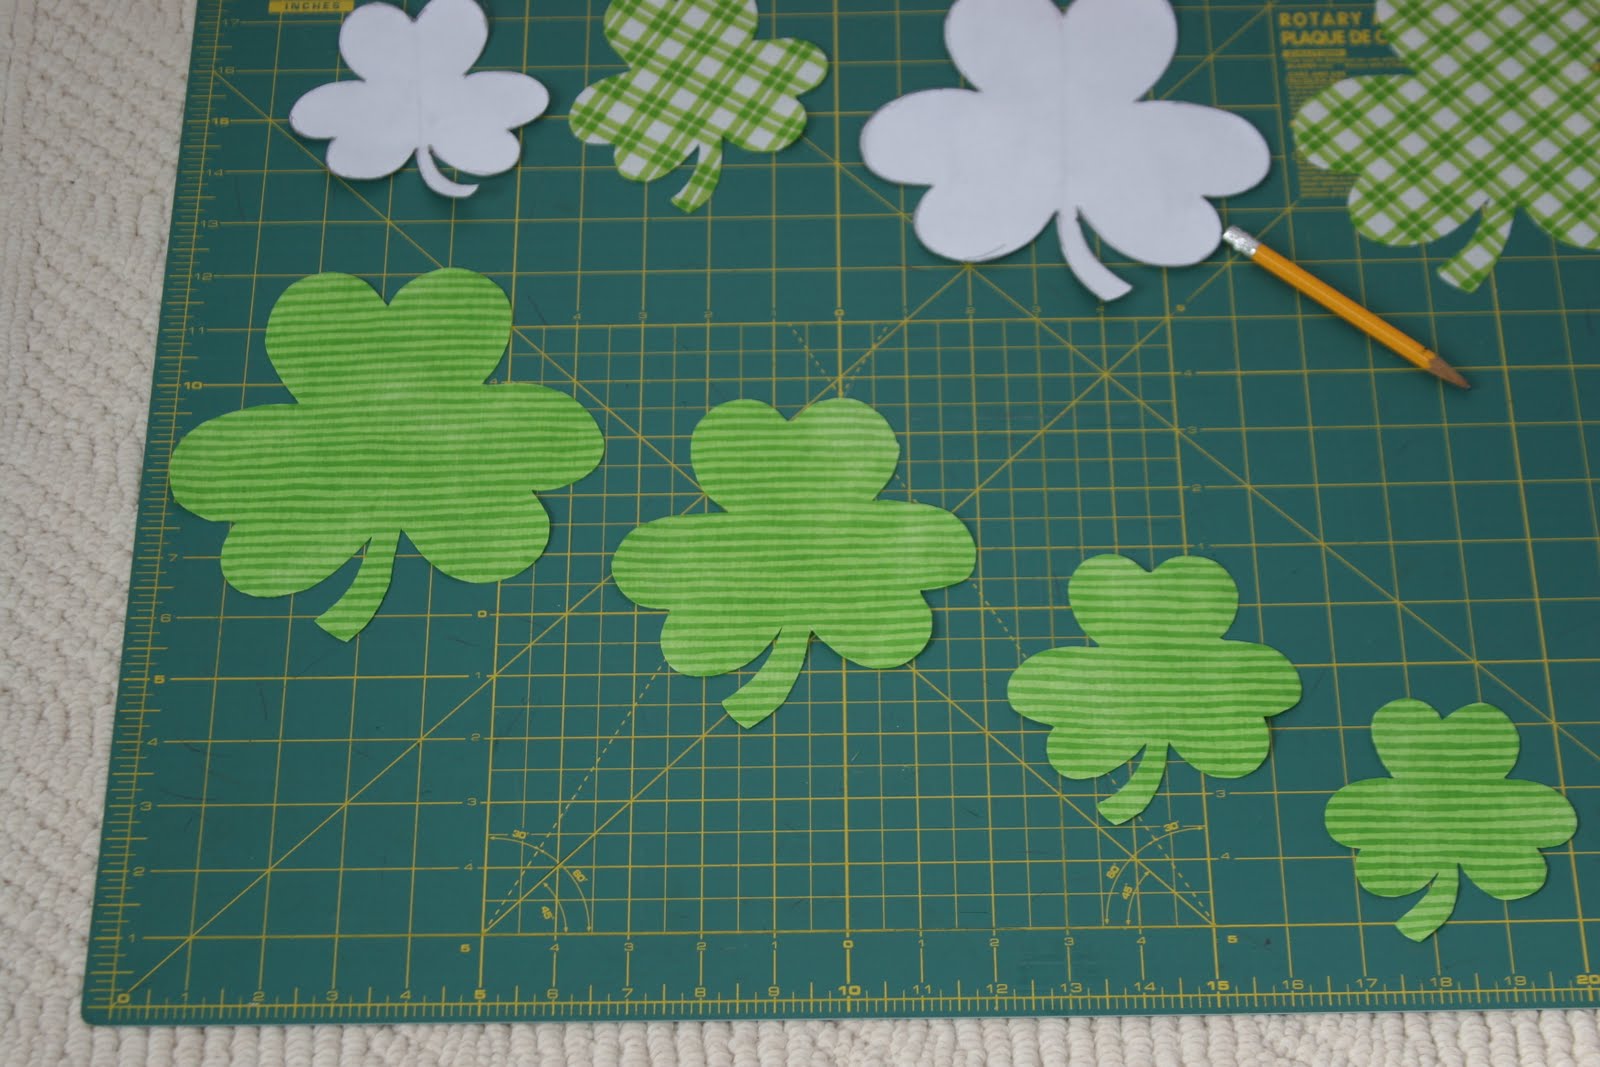
Step 3: Trace and cut out your shamrocks from your stiffened fabric:
- Print and cut out your paper shamrock templates (if you haven't done so already)
- Trace the paper shamrock templates onto the back of your stiffened fabric ...


- Cut out the 4 shamrocks that you traced on the fabric ...


Step 4: Sew your shamrocks:
- Lay the shamrocks on top of each other, starting with the largest shamrock. Centering each shamrock (center and line up the up the best you can)...

- Pin the fabric shamrock pieces ....

- Starting at the stop of the largest shamrock, sew down the middle of all the shamrocks (stop right before you get the the stem of the smallest shamrock) ...

Step 5: Press your sewn shamrock:
- Fold and crease the sewn shamrocks in half at the sewn line (fold back over front)...

- Press, with an iron (set at the cotton setting), down the sewn crease...

- Open the ironed shamrocks ... and Ta Da ... here's your "3D" Fabric Shamrock!
- Make as many as you want! Decorate how you want! Etc.!


My dining room has temporarily became my crafting/sewing room. My 'real creation' room is in our basement but it has been so dark, dreary, snowy, and rainy that I need to be near as much natural light as possible to keep myself from going insane! :)
You can see some of the crafts I've recently made (Fabric Shamrocks, Fabric Flowers (under Fun Stuff post), Valentine's Day Candy Sundaes)

You can see some of the crafts I've recently made (Fabric Shamrocks, Fabric Flowers (under Fun Stuff post), Valentine's Day Candy Sundaes)

Spring is almost here so I'll be moving back to my basement studio real soon
so we can have our dining room back.
1 comment:
So charming and fresh! I'm including this in a 5 for Friday ~ St. Patrick's Day Wreath Roundup on my blog today, including one pic and a link back to this post : )
Post a Comment